8.14.2014

a built-in DIY play kitchen

As I've mentioned before, since sending kid #2 to part-time daycare back in February, waiting in vain for custom orders to pick up (the "in vain" part I'll explain in a later post), I've been spending some of my 16 or so child-free hours each week catching up on projects around the house. We bought and moved into our little mid-century Oakland home almost exactly 4 years ago and it's taken us that long to even begin to finish some of the 70+ items on the to-do list we created after closing. We started updating the bathrooms almost two years ago; those are finally done. Well, you know, "done" for now. The kids' rooms I'd already painted and fussed with before kid #2's arrival. So all I have left to tackle is the combined living/dining area (we've rearranged the furniture in this not-so-great "great" room half-a-dozen times) and the kitchen, which needs a good spring cleaning, a fresh coat of paint, and, one day, a new refrigerator.


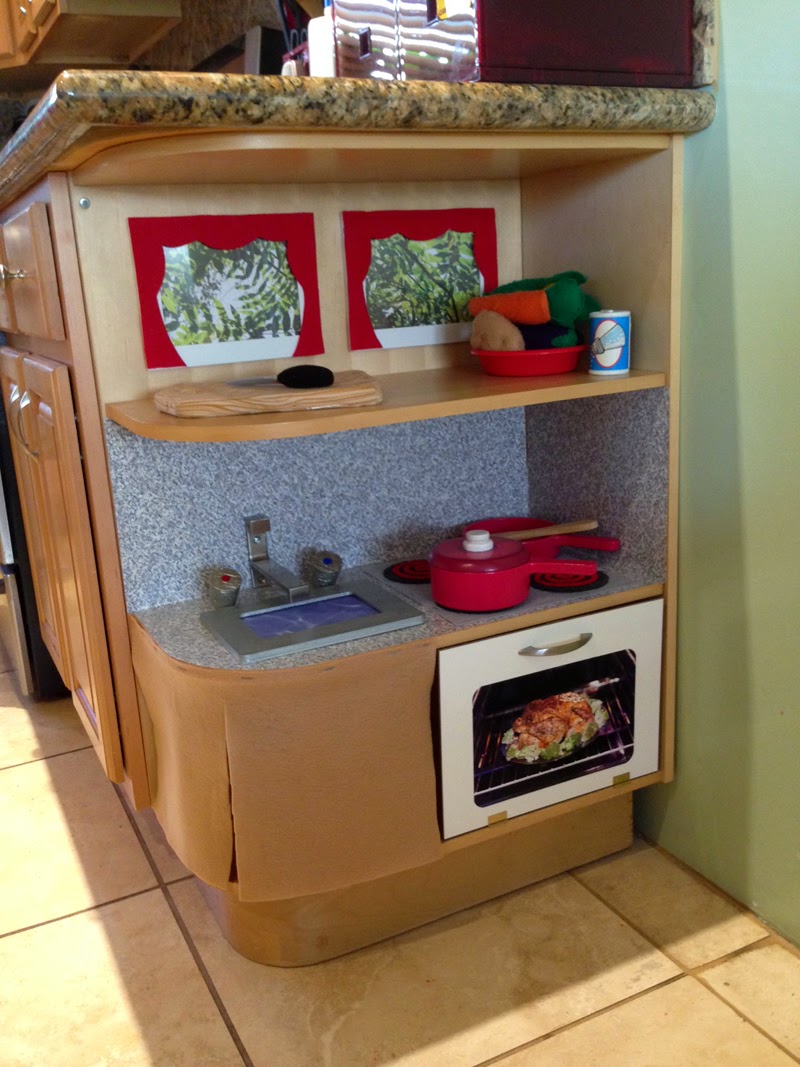
As a side-project of the kitchen plans, I've always wanted to transform this little built-in bookcase into a play kitchen, especially considering we're back in crazy toddler land with an 18 month old who would immediately destroy anything we put on those shelves (case in point: I've already had to fix or modify two elements in the play kitchen, finished just yesterday). Pre-fab play kitchens are expensive - okay, not that expensive, especially considering how much time I poured into this DIY version - and bulky, but mostly, I was smitten with the idea of creating a play kitchen that was built into an under-utilized portion of our real kitchen, daydreaming about an idyllic domestic scene that involves me cooking a real meal while both kids peacefully entertain themselves just feet away in their play kitchen ...Wait, where was I?


Ah yes, before and after. Do you suppose this "addition" increases our home value at all?? Not that we're planning on selling anytime soon, but really, who wouldn't want a built-in play kitchen? See idyllic domestic daydream, above. Anyway, does this post leave you with more questions than answers? Let's see if I can address a few of those now...


How long did this project take?
The "before" image above I originally posted to my Instagram account back in March or so. Those red IKEA coasters were part of the impetus for this project (they look just like stovetop burners, no?), but in the past six months, I've misplaced two of the four, so I was truly starting from scratch when I resumed this project last month. Inspiration and motivation combine with actual free time only occasionally, like a comet passing by Earth, but I've realized lately that I continue trouble-shooting a creative problem quite a bit in the long stretches of time between periods of actual productivity.


Is that a wall hook?
In addition, I get a lot of ideas from simply browsing different stores like Michael's (where I picked up the scrapbook papers above), Home Depot, IKEA (you say wall hook, I say super modern faucet), art supply stores, etc., a tactic which can prove time-consuming and expensive, however, if I'm not careful. But other than one round of returns, I did pretty well with this project both in terms of time spent shopping (notice how I specify time spent shopping, not time spent on the project in general) and overall cost.


How did you create a kitchen sink without making a huge hole in the shelf?
One of the biggest challenges was figuring out how to create a sink, for example, without any hardcore woodworking tools, like saws and stuff. I decided instead to paint a wooden picture frame with metallic silver paint, incorporate some of the water scrapbook paper mentioned above and call it a sink.

Whoa, is that real granite?
The "granite" counter and backsplash are made from contact paper I picked up at my local Ace Hardware store. Bonus feature - it's totally removable!


I'm curious about the sink fixtures, but can't remember what those hot and cold spinny-thingys are called...
Man, me neither! My original plan involved using a basic set of real bathroom fixtures but the cheapest set I could find was $25. When you consider spending $25 on one element of a DIY project, you really have to ask yourself if your project makes economical sense. Which is not to say this project does, but I was definitely not going to spend $25 on this part. Anyway, I found the wall hook at IKEA and love how that turned out. Even the 6 year-old got "faucet" right away. Success! But I wanted to take it one step further. I became obsessed with the idea of creating hot and cold handles (is that what they're called?) that could be rotated but not come off completely. So I spent a fair amount of time tinkering with a combination of dual threaded screws, t-nuts, and stop bolts recommended by the guy at Ace.


Unfortunately, I couldn't quite squeeze my drill in between the two shelves except at a slight angle and then the t-nut/screw/bolt combo wouldn't quite work right. So in the end, the hot/cold handles are cork painted with the same metallic silver paint used on the sink, with the dual threaded screw attaching those to the shelf (I had to drill a hole almost all the way through the cork to get most of the dual-threaded screw in then screw the portion of the screw sticking out of the cork into the angled holes I managed to drill into the shelf). We'll see how long it takes the kids to figure out that if they keep rotating the handles, they'll eventually come out all the way.


Tell me more about how you solved the problem of building a curved cabinet under the sink?
Since the shelves are curved, rather than drive myself crazy trying to build out some sort of rigid cabinet side and door, I simply stapled a large piece of tan felt, cutting a vertical slit at the corner for easy access to the under-sink storage area. (I've really gotten some mileage out of this tan felt, by the way, originally purchased in Boston for the cat carrier covers I threw together in 2009, before we moved back to California.)


Is that a chicken in the oven?!
It's a turkey! That part was easy. The oven door, not so much. I could've used a dozen different materials for this but decided on a prepped 9 x 12 inch clayboard at the art supply store - a decision motivated by the intersection of size and price with the option to paint on it. In the end, I printed a stock photo of a turkey roasting away and attached that to the front, used a leftover cabinet handle from our actual kitchen and bathroom, and a small set of hinges to attach the door to the bottom shelf. Initially I didn't want the hinges to show, but couldn't use the screws since they'd stick out of the relatively thin clayboard. So I tried three - yes, 3! - different kinds of glue. The kids broke the door off its hinges within 24 hours. So now the hinges show and I still need to find some sort of little stop bolts to cover up the little bit of the screw that pokes through the inside of the door.


How does the oven door stay shut?
With the power of magnets, my friends. And how powerful they are. The door stays closed thanks to a magnetic bracket thingy that is almost too powerful for the strength of the average toddler (you could say this play kitchen is ironically child-proofed in that way). My son can manage this no problem but my daughter occasionally has a hard time opening the oven. I'm thinking a thin piece of felt over the metal plate should help dull the magnet's pull just a bit. And if that takes me too long to finish, I figure the 18 month old will grow stronger over time, right?


What materials did you use to create the stovetop?
The stovetop is the last thing I tackled, which is ironic since it was the part I thought I had covered when I started this project. Now that half of my coaster/burners were missing, what should I use instead? When in doubt, I use felt!


I created four "burners" using charcoal gray felt, layered with three red, concentric circles and then hand-stitched all of those onto a lighter gray "stovetop" piece. The oven door is a bit wider than the stovetop since I attached the sink before the oven door, not quite leaving enough space to make the stovetop the same width. D'oh. Kids don't seem to mind this minor design flaw.


Why did you staple the stovetop onto the shelf/counter? 
Partly because while I want this play kitchen to be built-in, I don't necessarily want it to be a huge hassle to eventually remove or modify (look for a post about a DIY play kitchen remodel in about a decade).


Microwave or view?
Finally, for the top shelf, I thought about trying to create a microwave in half of the space but instead went a slightly easier route and created windows using leafy green scrapbook paper I found at Michael's placed in white 5 x 7 inch frames from IKEA, finished off with very simple red felt curtains. I'm not 100% satisfied with the curtains and I'm guessing the 18 month old isn't either since that's the first thing she attempted to destroy upon arriving home yesterday afternoon. Alas, hot glue gun does not fix every crafty problem!


But wait, where's the fridge?
Ah yes, this is what the 6 year old asked when he saw the project in progress last week. I'm working on it, sheesh.

8.13.2014

I have bitchy resting face.

First there was the art series and street campaign that hit Oakland a few months ago - it was called 'Stop Telling Women To Smile More'. Brooklyn artist Tatyana Fazlalizadeh wheat-pasted large-scale posters of women well, not smiling, in public places. That's cool. I saw one posted near the MLK Jr. Way entrance to the MacArthur Maze. The posters were also on view locally at the Betti Ono Gallery.


How many people do you suppose saw those? 5 million? Ish? Well, that's how many views this video has so far:


Hey, that's the girl from the AT&T commercials! Best part? "Um, ok!" Anyway, I'm so glad this issue is getting some exposure. After all, I too have bitchy resting face. Exhibit A:


A candid shot taken while touring Plymouth, MA, back in '06, which I blogged about here. Seriously, though, who knew this was a common experience for so many women? I can't tell you how many times I've been told, always by a man, that I should smile more.

7.10.2014

a summer of reading

The 6 year old got his own library card this past weekend. We signed him up for their summer reading program, by which he's encouraged to read at least ten books throughout the summer, getting a sticker for each one and hitting up the library for prizes at the 10 and 20 book level. Thing is, we read several chapters of a chapter book or several shorter books to him every night! So, inspired by the "book bonanza" incentive board I saw in the June/July issue of FamilyFun magazine, we've upped the ante a little, requiring him to read 1-2 "learn to read" books on his own (with our help, of course, if needed) or a chapter book that we'll read to him in order to earn a sticker plus a little prize in the mini sand pail, leftover from last year's birthday shenanigans.


Think it'll work? If nothing else, it provides a seasonal change to the fireplace mantel until we get around to that mini makeover we've been thinking about...


... just as soon as we finish the bathroom updates we started nearly two years ago:


So close!

7.09.2014

if SYTYCD was choreographed by kids

My favorite show is on again tonight. I've had some issues with the show the last couple of years, not to mention a newborn who kept me from watching consistently last summer, but it continues to be one of my favorite shows of all time, top in the reality category, and I very much look forward to it each week. A couple of summers ago I started letting my now 6 year old son watch the opening routine. He was pushing his 8 pm bedtime and, as we had no way to record it at that time, causing me to miss the first few minutes of the show. How does that expression go? If you can't fight 'em, join 'em?

Anyway, every year when the show begins I wonder what popular songs since the past season will choreographers use this time around. In the spirit of worlds colliding, what if some of the popular songs from kids' movies over the past year made their way onto the show? I admit I'm living full-time in this kid-friendly popular culture niche, but seriously, there have been an awful lot of songs from kids' movies on the radio lately. Consider, if you will, what the lineup might look like if choreography for the show was up to kids like my son:

Let It Go - Frozen
Okay, this one's pretty obvious, and I'd imagine they'd do a contemporary routine to the Demi Lovato version but it was actually while watching the more Broadway-esque "frozen fractals" moves by Elsa, performed by Idina Menzel, about 2 1/2 minutes into the movie version that got me thinking about all this in the first place. And a quick search on YouTube yields quite a few amateur dancers who've already given it a shot.


And yeah, I know this has already been done on Dancing With The Stars, but you and I both know that doesn't really count. And anyway, their version is so ... obvious. The choreography is actually set to the movie version, so I'll give them that, but pro dancer Peta Murgatroyd is dressed and made up to look like Elsa, which is unnecessary, and really, the choreography should be performed by a soloist, or two girls, like in past finale shows, don't you think?

Everything Is Awesome by Tegan and Sara - The Lego Movie
Like this fitness dance choreo? Well, not exactly. Or this more, uh, artistic interpretation?


Um, no. I'm thinking a little hip hop number by Christopher Scott, perhaps? In the meantime, Chris, enjoy some freestyle moves by local kindergarteners for inspiration.


What Is Love - Rio 2
Maybe a latin ballroom number set to this catchy tune by Janelle MonĂ¡e?


Pompeii by Bastille - Mr. Peabody & Sherman
There was a song in Mr. Peabody & Sherman? Um, yeah. I didn't even see this one but when it came on the radio recently my son asked me to turn it up. When I asked him where he'd heard it he remembered the song from the kid's movie. His favorite part seems to be the "a-o" bit in the chorus. Not sure about choreo on this one - maybe a lyrical hip hop number like this one?


Home by Phillip Phillips - DisneyNature's Bears
The video for this song actually premiered on SYTYCD back in 2012 so it's a no-brainer. And contemporary would be the obvious choice but I could also see some sort of ballroom routine set to this.

Anything you (or your kid) would add?

7.08.2014

three cheers for summer camp

After an epic summer vacation kick-off, spending the past month with at least one of my two kids at all times, sometimes both, I'm enjoying some peaceful work time again this week and quickly catching up. Don't get me wrong - I'm lucky and grateful to be able to spend big chunks of time with my kids throughout the year. That's why I do what I do, even if it doesn't make much financial sense some months! But I'm also grateful for summer camp. Amirite, mamas?


First up, I added a new design right before I went into vacation mode last month - a "French country" or "herbal" wedding invitation in sage, moss, and aubergine. Samples are also available. I just sent another new design off to the printer yesterday so stay tuned for that one in about a week or so!


And yesterday, I nominated my business for the Martha Stewart American Made 2014 Awards. I nominated myself a couple of years ago and it's funny, on the one hand, I'm two years wiser in this micro business adventure, but on the other hand, I'm still catching up from my extended maternity leave with baby #2. "Describe your workspace." Um, well, right now I'm typing this at my dining room table. My husband, who also works from home, is across the living room at our one desk, which I occasionally use when I need to print something since that desk is located next to the entryway closet where my printer is stashed. And if I need to fetch an item from my ready-to-send inventory or package up a custom order, I'll head out to my garage, where I store all of the stuff that used to fit into my home office/studio, now my daughter's room. So, yeah, I could really use that $10K. And in general, my attitude in life lately is a little like buying a lottery ticket: you can't win if you don't play, right? Wish me luck!

4.04.2014

the hungry toddler: Farley's East

The hungry toddler is back, with an all-new toddler (I almost wrote "new and improved" but I think that would be a little messed up, catchy as it is)! Since "baby" #2 is really a toddler now, I thought it would be fun (and by fun I mean only occasionally miserable) to revive this series of posts, since I started a little too late with child #1, now undeniably a "big kid", a decent eater, and relatively well-behaved at restaurants. Where's the fun in that?! I considered moving this series of blog updates to my more family-oriented blog but these posts are really more about the places we go in and around Oakland, not so much an update on the toddler. Right?


Okay, let's get right to it! This morning I met up with a friend and her budding toddler, just a couple weeks older than my own, at Farley's East in the uptown section of Oakland. Initially we were going to meet at Hive, which I know has a kids' play area (more about Hive in a separate post). Then last night this friend texted me asking if I'd be up for meeting at Farley's East instead, because her husband told her it had a kids' area as well. Wait a minute, was this that place that has the outdoor seating in what is essentially a parking space? I've passed by it several times (in fact, I used to work in this area years ago) - it's always packed to the gills with hipster-types (not that there's anything wrong with that). So I checked the Yelp page on my phone, scrolled down to the "good for kids?" area, saw that that question was answered "no" and decided to do a little more online investigating. Sure enough, I came across this article that mentions the loft area upstairs and a little space with kids' toys, puzzles, and books. Okay, I texted my friend, let's give it a shot!


The coffee shop does indeed have an undeniably hipster vibe to it (but really, what doesn't these days, especially in certain parts of Oakland?), and we got a lot of the typical hipster-encounters-child stares, as if we were toting aliens around on our hips (yes, sometimes I wonder and do a double-take, myself), but other than that I found the more negative reviews to be debunked by what was very friendly counter service, a delicious almond milk latte, and a yummy, if a bit early, salted chocolate chip cookie (I mean, really, what's the difference, calorically speaking, between a cookie and a scone or muffin, right?).

As for the kids' area, it's no Play Cafe. My toddler tripped and bonked her chin on the corner of the coffee table and both kids tried repeatedly to put that zebra, which looks deceptively clean in this image, in their mouths. And this area is right around the corner from the stairs which, obviously, pose a slight hazard to the toddler age group. So, ironically, I too would indicate that it's not so great for kids if I left a review on Yelp. I did, however, file it away under possible places to get a little laptop work in while the toddler's in daycare.

4.01.2014

burning bridges: F is for facetious

I've got one more maker in the middle post for you that I'll get to either tomorrow or next Wednesday. Etsy shut down my forum post pretty quickly, citing self-promotion, so only two sellers had a chance to reply before that happened. I guess I can see where they're coming from. And I guess it is a little like complaining about the boss at the office. Actually, it's more like complaining about the office building, or maybe the office manager? I don't know, I'm a little sloppy with my analogies. At any rate, that may be a short-lived series. In the meantime, and in the spirit of potentially burning bridges, I thought it would be fun to take a little stroll down the job section of memory lane since I'm clearly still deciding what I want to be when I grow up.When I was in high school I made the declaration that I wanted to have 20 jobs by the time I was 27 which, in hindsight, is a little nuts! I didn't quite reach that goal, but I've had at least 10 distinct jobs, maybe more depending on how you count different positions at the same place. Skipping over babysitting entirely, let's get started, shall we?

First up is a summer position between junior and senior years of high school. This was one of those high school summer work programs, that paired students with low-paying positions in various locations around Patch Barracks, where we lived at the time. I was assigned to some sort of architectural office and what I remember of the 5 or 6 hours I worked there each day for about six weeks of my summer vacation involves reorganizing their supply closets. Surely I did more than that, right? It was easily one of the most boring jobs I've ever had. After "work" I'd go to the base gym for a couple of hours (really, like, 2 hours!) until my Dad got off work and we'd drive home. There was a real tool of a guy who worked there who kind of gave me a hard time. At one point he laughed and said he was just being facetious. Facetious? I had to look up the meaning of the word and, to this day, I always think of that guy when I hear that word. And I'm not being facetious. Anyway, my career in boring office work had officially begun!

PS: Yes, that's a picture of me from around that time. This image was taken during a soccer tournament, as we waited for our turn to play, but I'd imagine this is how my face looked most of the time I was at this particular summer job.

3.27.2014

chalkboard paint rules

Since work is so slow, I'm using some of my daycare time to catch up on the never-ending list of projects around the house. It's a two steps forward, one step back feeling, with two projects popping  up for every one that you successfully cross off the list. But ever since baby #2 was born, it's been simply two steps back, and two more steps back, and so on. You get the idea. So it's nice to have some time, if not the money, to tackle some of these projects.

I've written here before about making over my son's room when he transitioned from a crib to a "big boy bed." Less than three years later, we've tweaked things again, adding an IKEA Expedit bookshelf on one wall for books and toys and a dresser on the other, using his closet now primarily for overflow toy storage.


When we decided to get him a desk for all of his art supplies that were previously in a corner of the living room, I thought it might be fun, if a bit dusty at times, to add a few half-wall areas of chalkboard paint. And it turns out you can get any color of Benjamin Moore paint as chalkboard paint! Awesome!


I asked my son what color he wanted. Initially he said red but I steered him toward a color already in his room's "palette", thinking red against the green might be a bit too ... festive (not to mention intense!). We settled on Ol' Blue Eyes (not to be confused with Old Blue Jeans which is the color the guy at the paint store initially ordered), a shade remarkably close to the blue on the side panel of the loft bed we have in his room (also from IKEA).


I spent a little time each week over the past three weeks doing the actual painting, giving it three coats to sufficiently block out the bright green underneath. After that, it's advised that you let it "cure" for three days, then apply chalk to the entire surface and wipe that down before using it. Wiping with a wet cloth is recommended over a traditional chalkboard eraser and I have to agree, it works really well. It wipes very clean and there is little dust.


In addition to the chalkboard paint, I added some old-school wooden rulers as a decorative trim between the chalkboard paint and the original green wall. I'm pretty pleased with how that turned out. One is tucked behind the bed a bit for now but otherwise I didn't have to do any trimming or cutting. I used brown furniture nails I picked up at my local Ace Hardware store to match the other bits of brown in his room (my least favorite color in his room but I find I keep tying it in to match the brown of his curtains, always trying to use or incorporate what we already have).


I did a fair amount of touch-up of the green color, you know, while I was at it (a kid can be rough on a wall in 2 1/2 years!). To avoid random push pin holes here and there I added three cork board tiles to his closet door (and another one went into little sister's room, previously known as my studio), for random and temporary things he might want on display.


To decorate a bit more, I used a couple of his art projects from this year so far and from preschool, finally installing the flying hamburger we made together a few months ago and using this crazy long snake he made during his last few months of preschool last spring/summer.


When I first unfolded it (I've been keeping a bag of possible art projects to use as decoration - things that wouldn't fit into his box of saved projects or binders of drawings), I thought it would wrap around his wall like a border.


In the end, the snake twists and turns a bit more than I originally anticipated but I made it work and I rather like the way it winds underneath that set of three drawings by Neal, don't you? Hey, man, I paid big bucks for my MFA; it oughtta be good for something, right?


As with most things like this, I think this probably turned out better than a more straight-forward border-like presentation would have been, winding instead under artwork, below his bed, underground and behind his dresser (not really, but that's the look I'm going for here), and winding back out above his bed.


The snake should make for some sweet dreamin', don't you think??

3.19.2014

an Etsy seller stuck in the middle

Baby #2 has been in part-time daycare for about a month and a half now (give or take; between a gradual transition and about four full days out for illness, I've had about 10 days to work over the past six or seven weeks). And I ain't gonna lie - business has been slow. February has always been my slowest month, even during my steadiest stretch since officially starting my business in 2010. But with just two clients at the moment and my other shop all but flat-lining, I've been wondering if Etsy is the right venue for a sole proprietor somewhere between "fresh shops" and "featured seller."

Right before I closed my shop in anticipation of baby #2's arrival and the start of my year-long hiatus, there was a fair amount of online chatter about how Etsy as a forum for sellers was changing, with some resell operations abusing its policies, sellers unsatisfied, to say the least, with the company's official response, and others who'd made the leap from mom & pop shop (or just mom, as is often the case) to a level of success that includes things like wholesale accounts, hiring employees, and seeking out manufacturers to produce what are essentially handmade prototypes. You could say they'd outgrown Etsy. In response, I'm sure, Etsy seems to have fully embraced such sellers, establishing Etsy Wholesale, featuring more and more shops that have already enjoyed a fair amount of buzz and exposure, small business owners who've brought on one or more employees, makers who work with manufacturers to fabricate what are essentially handmade prototypes, etc.

And I get it. From a business perspective it makes sense that Etsy would evolve in response to the first wave of sellers who came online in its infancy in 2005-07, let's say, having outgrown the original parameters of the online marketplace. To balance things out, perhaps, Etsy still features "fresh shops" from time to time, has increased posts in its Seller Handbook, even introducing a pitch form for sellers to pitch ideas (or themselves, as it were) for blog consideration. And that's great buzz if you can get it, but what about the sort of mid-level sellers who are using Etsy circa 2007-08 - accidental entrepreneurs, "work at home" moms, and other "micro" business owners who haven't yet made the leap to featured seller status?

Granted, I have a lot of work to do in my main shop to get it back up to speed (I have 40 designs and product listings at the moment, compared to around 100 at the time of baby #2's arrival a little over a year ago). But I can't help but feel a little like Etsy's middle child and I'm honestly not sure what my next move should be. I can't help but wonder if there are other Etsy sellers out there who feel the same way? Stay tuned to follow my journey and perhaps the stories of other "middle child" Etsy sellers!

new products, new friends

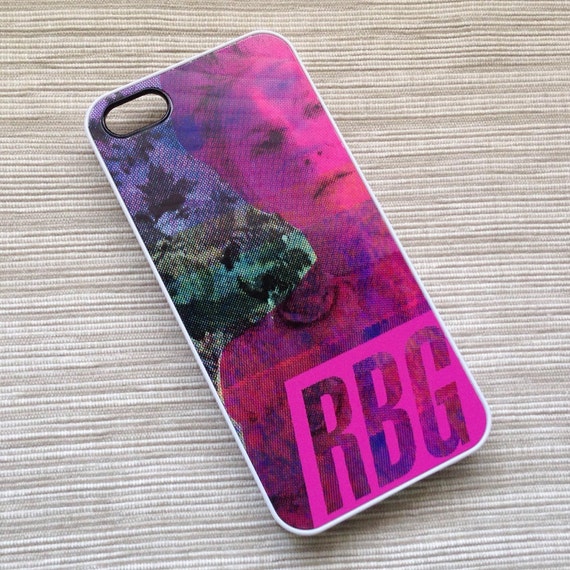
I started a long post on my other, more crafty blog recently wondering if Etsy is abandoning it's "middle class," with features on shops that have already enjoyed a certain level of success and buzz, hired employees, use manufacturers to make their products, etc., and, on the other hand, so-called "fresh shops." What if you're in the middle? Anyway, I'm not done with it yet but needless to say, business has been slow over the past six weeks since baby #2 started part-time daycare. But, I'm trying not to get bogged down in fretting over sales and using the dedicated child-free work time instead to continue to get my shop up to speed (as well as catch up on some projects around the house, I won't lie!). On that note, this week I've added a sample pack to the shop as well as a brand new product, custom iPhone cases with my artwork and your initials!


The first iPhone case in the shop is based on one of the screenprints from this set of prints, which use imagery from Sofia Coppola's film 'Marie Antoinette' - the original project merged imagery from the film, printed in the CMYK 4-color separation print process on wallpaper, with text in the style of the film's poster, using all three women's names: Marie (Antoinette), Sofia (Coppola), and Kirsten (Dunst). A little product inspiration from my art school days! Along those lines, I have a design idea for at least one more custom iPhone case so stay tuned for more product updates in the next few weeks.

image courtesy of Susannah Eloyse Prinz
In other news, my friend Susannah (Susannah Eloyse Prinz, in case you're looking for her cards anywhere Papyrus cards are sold!), whose daughter is in my son's kindergarten class, recently shared a couple of my products on her blog and I wanted to share the love here. It's been so interesting to meet another parent whose background is so parallel to mine - Susannah got her MFA from SFAI (around the same time I was pursuing my degree at SMFA in Boston) and now does freelance design work for Papyrus, in addition to her own paintings, which look amazing online; I can't wait to take her up on her offer for a studio visit (plus, she has her own chickens - I have this weird fantasy of having a chicken coop in my back yard with 5 or 6 chickens one day. Imagine, fresh eggs every morning!). She's been posting sneak peeks of her card designs on Instagram - check her out for some really gorgeous greeting cards. And check back here for more updates in the coming weeks!

2.14.2014

Valentine's Day round-up (and a bonus muffin makeover!)

As far as holiday shenanigans go, this year I've been more productive than last (what with baby #2 being less than two weeks old this time last year) but less productive than 2012, when the highlight of Valentine's Day festivities included heart-shaped scones I'd made the night before (I do love me some scones). I had ingredients to make blackberry chocolate chip scones but by the time both kids were in bed last night, having handled after-school time, dinner, and bedtime solo, that recipe seemed far too fussy. Instead, I threw the ingredients into Ina Garten's delicious but incredibly unhealthy strawberry muffin recipe (halved the recipe, subbing blackberries for the strawberries, obviously, and adding in about 1/2 cup of mini chocolate chips, making them even less healthy) and baked them up in a heart-shaped pan.


This is the same pan I used for the heart-shaped crayons the 5 year old will distribute to his classmates this afternoon.


I'm pretty sure I got all the melted crayon residue out... Anyway, for the crayons we remelted a 4+ year supply of broken crayons - the 5 year old did all the color mixing in a 24 slot mini muffin pan first then I transferred each "pod" to the heart-shaped pan and popped them in a 250 degree oven for about 12 minutes.


They popped right out of the pan when completely cool. And they turned out really well, I'd say better than my first attempt at this kind of thing way back when the Makery was still "fresh on Mondays".


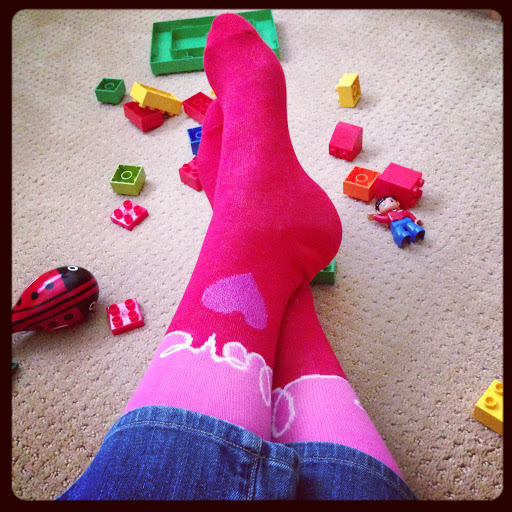
And that's about it, folks. Oh, wait, I am wearing the festive socks my mother-in-law gave me when she came up for the baby's birthday bash a couple of weeks ago. That's enough, right?

PS - want to make a slightly healthier version of Ina Garten's muffins? If you don't want to use two whole sticks of butter (TWO STICKS!), give this makeover a try (changes to the original recipe are in bold; follow cooking instructions here):

Instead of 3 cups AP flour, use 1 cup whole wheat flour + 2 cups AP flour
1 tablespoon baking powder
1/2 teaspoon baking soda
1 1/2 tablespoons ground cinnamon
1 1/4 cups 1% milk
2 extra-large eggs, lightly beaten
1 stick unsalted butter, melted + 1 mixed fruit/veggie pouch (I used one of these)
2 cups diced fresh strawberries 
(this recipe makes a great base muffin recipe so any fruit will do - I used diced kiwi + blueberries for this makeover, because every once in awhile I forget that nobody in my house will eat kiwis but I buy them anyway)
3/4 cup sugar


The slightly healthier muffins turned out pretty well, all things considered, although my first thought was, "mmm, these would be good with a little butter!" Kind of defeats the purpose but if you can resist that addition, they were still light and moist and plenty sweet. Using a generous amount of baking powder, cinnamon, and adding the sugar at the end is indeed genius. But two sticks of butter is insane, Ina, just insane!
Enjoy!

1.20.2014

a painter's approach to New Year's resolutions

I've been mulling over so many blog post ideas lately with little time to sit down and actually hammer them out. That's one thing that's somewhat maddening about being the primary caretaker for a baby, as I have been for just about a year now (babe #2 turns 1 in less than two weeks!) - I have so much time to think and look around the house and at my life and make these mental lists of all the things I'd love to work on but without the kid-free time or, when the kids are finally conked out for the day, the energy to get much done. And I wish I was better about letting that kind of stuff go. I think I did pretty well for about ten months, letting things go, putting things off, ignoring things that could wait and focusing my energy instead on a baby quickly turning into a toddler and a big kid transitioning to "real school". But over the past couple of months, maybe because of the holiday clutter added to the usual clutter in my life, the list of things I'd like to work on has really started to bug me. Fortunately, said baby is headed to part-time daycare in a few weeks, which will give me part of the week to work and, while work is getting back up to speed, hopefully tackle all of the lists I've been making over the past year.

All that said, and before we venture much further into this New Year, I thought I'd write a little something on the topic of resolutions. It seems like the trend lately is to forgo resolutions, or at least avoid making them public. I guess the idea there is that if you've been doing what you want to do over the past year why change anything? I totally disagree. For starters, you could always be doing better at something or more of something else. Maybe you need to be doing less of something. There is always room for improvement, friends. And I approach resolutions the way I used to approach painting - make 20 paintings and 2 or 3 are bound to be pretty good. If I take this opportunity to reflect on where I am in life and I come up with a long list of areas where I can improve, I'm bound to be successful in at least a few of those categories, right?

And yet, the one resolution I'll share here is a total cliche among resolutions: eat better, exercise more, lose weight and get back in shape. But I stick with that one resolution (or is it 3 or 4?) because a) it's been a couple of years since I felt really healthy, getting pregnant right after running the 2012 Oakland Marathon and having my second and final baby almost a year ago - it's time to lose those last 10 pounds of baby weight and get back in half-marathon shape (I don't think I'll ever attempt a full again but I love the idea of being always physically able and ready to run an "easy" 10-miler or a half-marathon race. Plus, you know, zombie apocalypse.). And b) focusing my energy on that one area of my life will trickle down to everything else. It always does. When I'm eating better and moving more I feel better, I have more energy, I'm a happier and more patient person and therefore a better partner and mother. It's a cliche but it's true - when I'm living a healthier life, the entire family benefits. I'm putting my oxygen mask on first, or something like that. Heck, it's been scientifically proven to increase one's happiness. (Love that happiness checklist, by the way.)

Thus, I present to you, my Rules for 2014 (I'm a big fan of rules; life is just one slippery slope otherwise):

1. Avoid the 4 Cs. I'm stealing this one from chef Alton Brown - I'm pretty certain this was one of his diet rules when he lost all that weight a few years ago, although I can't find it anywhere in web writing. Anyway, the idea is that eating well starts in the grocery store and there will be no candy, no cookies, no crackers, no chips in my grocery cart. This mostly goes for the kids, too, except the budding toddler loves Ritz crackers so we'll allow her to indulge a bit longer. Also, the big kid has a "treat bag" that seems to always have candy in it, between holidays and birthday party pinatas year-round, so he's usually allowed one small item from his treat bag after dinner most nights. I have absolutely no willpower when it comes to sweets (which is why they simply cannot be in the house in order for me to be successful here) but somehow I manage to respect the boundary between his treats and mine and his stash doesn't tempt me at all. The one caveat here is I simply cannot live without dark chocolate. The darker the chocolate, the better I am at limiting myself to a square or two a day (about an ounce max satisfies my craving).

2. Curb snacking between meals. I've tried the whole eat six small meals idea and it never works. It starts out well enough but eventually my snacks and small meals turn into, basically, six regular meals. That's too much food. Better to avoid eating between meals altogether. But if I must have a snack to tide me over, my snack rule is this: if I need something between breakfast and lunch, I can have fruit. If I need something between lunch and dinner, veggies it is. Hummus is okay, too, because chickpeas are kind of like veggies, right? Whatever, if it gets me to eat carrots every day I figure it should be allowed. Spreading a little peanut butter on celery is also okay but I draw the line at Ranch dressing. There will be none of that.


3. No dessert during the week. I'll allow myself 3 cups or so of stove-popped popcorn and one See's Scotchmallow cut into teeny-tiny pieces. It worked when I did Weight Watchers a few years ago, so I'll allow myself that treat once or twice a week. Otherwise, I'll try to enjoy a cup of tea in lieu of a more caloric nightcap. On the weekends I can treat myself to one thing, but I can't go to James and the Giant Cupcake, for example, and splurge on a half-dozen cupcakes. Just the one.

4. Say NO to liquid calories! I remember reading this in a fitness magazine some years ago and it always stuck with me because it sounded so silly, as if the calories from beverages can be likened to drugs or something. But they are sneaky and addictive. And while I don't drink juice, sugary sodas, or even much alcohol on a regular basis, I do enjoy coffee beverages every now and then and since I'll be laptopping it at cafes for some of my dedicated work time going forward, I have a feeling this rule will be an important one.

5. And finally, exercise. Every day. My goal is to do something active for 20-30 minutes every day with one total rest day per week allowed. I've been running again for a few months now but very slowly and very sporadically and so far at least always with at least one kid in tow (usually the baby in the jogging stroller which is a little like running through molasses; occasionally the big kid will ride his bike ahead of me as well). I'm glad I can squeeze in exercise this way but it's not the same as running solo early in the morning. That I hope to add in this spring, once the sun is rising a little earlier and I'm no longer breastfeeding first thing in the morning. In the meantime, I've been doing 30 Day Shred as often as I can manage, either during the baby's nap or after both kids are in bed. I can't wait to add those early morning solo runs back in - doing so will check off 2 items from the happiness checklist (#s 1 and 5)!


Speaking of that happiness checklist, my bonus resolution for 2014, of course, what with the youngest member of my family soon headed to someone else's care for a few days each week, is to spend more time doing my own thing, that thing being primarily design work for which I am paid but also, hopefully, maybe, if I can squeeze it in, some of my own creative work. On a recent road trip to visit family in Southern California, I was able to find, thanks to my big brother's amazing memory, the house where we lived in Escondido for about two years when I was a toddler. I've been feeling pretty nostalgic lately, and this kind of thinking has always lended itself to my creative work. It's been awhile since I started on a new project but a really specific idea came to me after this trip (it has a little something to do with #8 on the list - "plan a trip - but don't take one") and I'm hoping to carve out some time to work on it once I'm over the hump of this next big transition coming up. Stay tuned and cheers to a healthy and productive 2014, y'all!

12.18.2013

fresh from the Makery: DIY knock-off gingerbread train

We get an obscene number of catalogs this time of year. I bought a gift basket from Harry & David once, years ago, but continue to get catalogs from them several times a year. That kinda thing. In fact, I think West Elm is able to send you a catalog just by walking into their store. They must have some sort of invisible machine that scans your address on your person somehow - billing address from a credit card in your wallet maybe - and there is a catalog in your mailbox by the time you get home. And I enjoy looking through them. I remember as a kid, especially around the holidays, I'd look through catalogs and choose one thing I'd buy from each page if I could. One item from each page! I mean, obviously, I didn't actually get all those things but I think I continue to practice that form of "aspirational living" to some extent, browsing through catalogs from stores I rarely shop at.


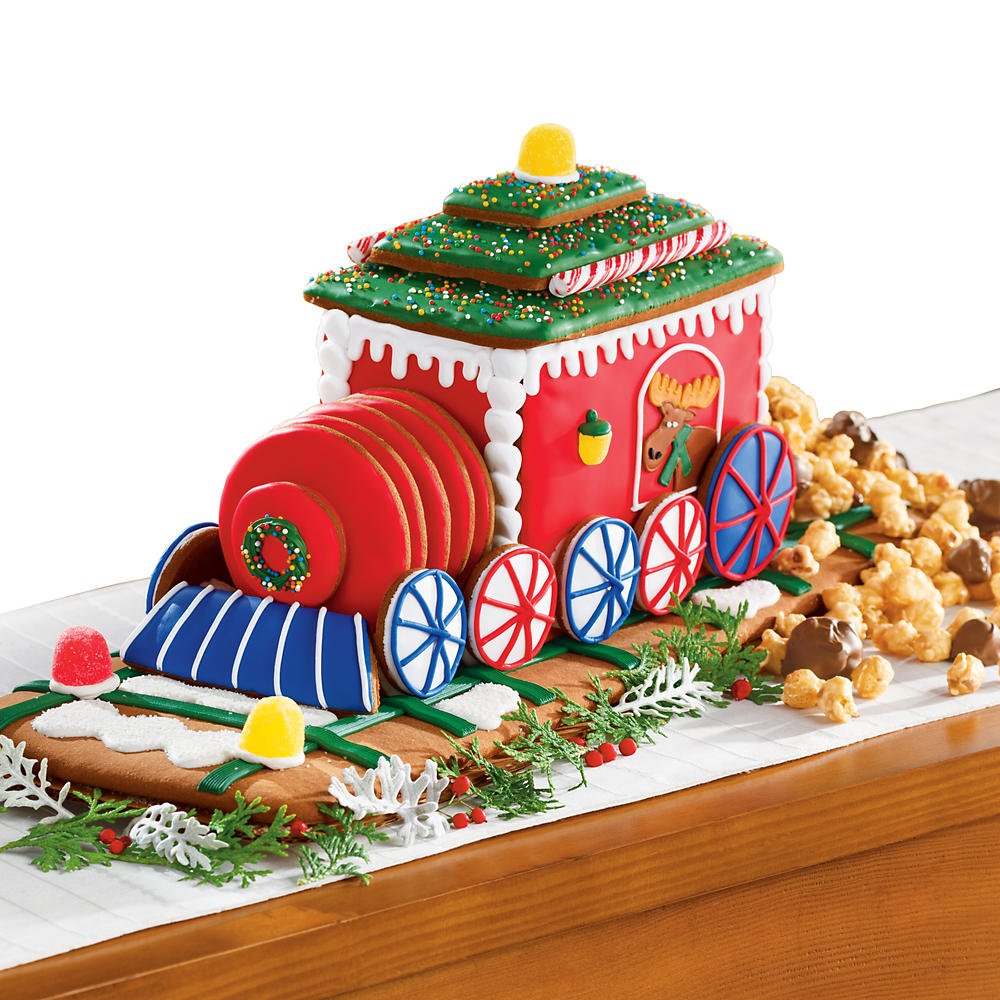
I spied this gingerbread train in the Harry & David catalog doing just that kind of thing a couple of weeks ago and I thought, in a temporary lapse of sanity, I could totally make that! With the 5 year old enlisted to help decorate! I've made gingerbread cookies before. I mean, really, how hard could it be?


Yep, nailed it! In our defense, it was actually the icing that flopped.


This was a first for me so I didn't really know what I should have been going for in terms of royal icing consistency. Now I know I probably need to increase the powdered sugar to egg yolk ratio and beat the mixture much longer.


That said, the runny icing worked fine for assembly, if a bit frustrating (and I think it would actually work pretty well to decorate the pieces separately before assembly). If I had to do it again, in addition to tweaking my royal icing recipe, I'd make sure to roll out the gingerbread a little thinner than 1/4 inch before cutting it. The thinner pieces were definitely a bit easier to work with.


Once I had it assembled, it only took a few extra minutes to set up enough to decorate it without imploding it.


I let the 5 year old do most of the decorating, helping him pipe out the runny icing and, when gravity worked against us in terms of adding decorations, we used some red and green candy melts instead.


But wait, there's more! Want to make your own DIY knock-off Harry & David inspired gingerbread train?  I thought so! Just click on the two images above and print each JPEG on 8 1/2 by 11 inch card stock, cut out the pieces, and use them as templates for your rolled gingerbread pieces.


I baked the pieces anywhere from 12 to 20 minutes (12 minutes for the smaller circles, and up to about 20 minutes for the larger pieces). I like weelicious' recipe for gingerbread cookies; there may be a different recipe out there better suited to gingerbread structures like this but the weelicious recipe worked just fine and I'm assuming it's pretty tasty even sitting out for a couple of days as parts of the train have started to slowly disappear.

Anyway, the project was fun to tackle with my son. Even though it didn't quite turn out as I imagined, he had a blast decorating it (consuming way too much sugar while he did so) and we're still brainstorming what we might make next year out of gingerbread. I think we might have started a new family holiday tradition.

PS - You can use the egg yolks and any leftover lemon juice from the royal icing recipe to make lemon curd (if you're feeling really ambitious you could even put it in little jars, slap a bow on it, and give it to someone local as a holiday gift!). I don't know about you but I like to use "the whole animal," so to speak.